Welcome to the Lilly Bug Blog!

Please visit and see what's happening behind the scenes at Lilly Bug Studio.

Don't hesitate to leave a comment or to follow this blog.

And please remember to visit the Lilly Bug Studio website and the Lilly Bug Boutique Etsy store.

Thank you for visiting! :-)

Monday, November 15, 2010

A Button Makeover

glitterfied buttons


I love buttons as much as I love glitter, so why not combine the two for a “cute-as- a-button sparkly” project? Store bought buttons are great, but to add to my collection, I opted to make some of my own buttons using polymer clay. And of course I decided to embellish my buttons with some wonderful Art Glitter colors. I also decided to add a glittery surface to a couple of store bought buttons to show that you can transform an ugly store bought button into something pretty. One example of a rather “blah” looking button was this gold and cream colored button. It came in a bagged assortment of buttons and I honestly thought I’d never use this particular button for embellishing any of my projects. Instead of embellishing with this button, I embellished the button itself. After I added some glitter, I altered the gold color on the button with some alcohol ink. I like how the button turned out after some glitter and alcohol ink alterations. It didn’t take a lot of effort to get some pleasing results. I used the Designer Dries Clear Adhesive, #519 Reed and #58 Brown on the store bought “blah” button. How do you think it looks?
an ugly button gets a makeover

an ugly button makeover!


I used the same type of materials for my polymer clay buttons. First, I added the glitter with the Dries Clear Adhesive. Then I applied some glossy accents over the glitter. Next I decided to see how the alcohol inks would look over the glossy covered glitter. On one button I had used #84 Shiney Si Ultrafine Opaque glitter covered with glossy accents and used a mix of blue and butterscotch colored alcohol ink as a last layer. This created a new and interesting color effect over the glitter. The button is shown in the following photo.

green handmade button pendant

And of course I could not forget to add some of my favorite colored glitter to a few of my buttons. What color is that? It’s the #D1 Dazzlers Crazy Corn color. As I mentioned in a previous article, it’s hard not to add it to all my pieces because I love how sparkly it is and how there’s a variation of large pieces of glitter along with smaller pieces. Again, I used the Designer Dries Clear Adhesive for adding glitter to the polymer clay buttons. And I covered the Dazzlers Crazy Corn with the glossy accents to highlight the super sparkliness of this gorgeous glitter color. Look at it sparkle in the next couple of photos!

handmade glitter button pendant

Can you count how many buttons I used Crazy Corn on?

glittery buttons
After decorating the buttons, I made some of them into rings and some as pendants.

Glittery button rings

Supplies used for my buttons: #84 Shiney Si Ultrafine Opaque, #58 Brown Ultrafine Opaque, #D1 Dazzlers Crazy Corn, #519 Reed Microfine Opaque, #65 Old Gold Ultrafine Opaque, #184 T-Bird Ultrafine Pearlescent, Designer Dries Clear Adhesive, Ultrafine Metal Tip, Glossy Accents, alcohol inks, antique gel medium, thread, jewelry findings-ring bases & bails.

glittery button rings

Please visit my Etsy shop, Lilly Bug Boutique, where some of the pieces shown are available to purchase.

You can also visit my WordPress Blog to see the same post, eventually I will only be blogging using WordPress.


Tuesday, October 26, 2010

Hearts of Glitter


I'm beginning to blog using the WordPress platform, so please click here to see my full Art Glitter article about embellishing some cute little heart boxes with gorgeous glitter!

Friday, October 15, 2010

Green "shoe" box

I had fun making this box using cardboard packaging material and adhesive flicker green paper. It took longer to make than anticipated, but I am happy with how it turned out. I have an old book, "Creative Gift Wrapping" by Sandra Roth & Beverly Bieker, that shows how to make unique gift packaging and they made a sneaker box from a cereal box. I adapted mine to a smaller size. It was a perfect box to send to my favorite youtubers, Rhett and Link. I filled the box with Jolly Ranchers and shipped it out for Rhett's birthday. Earlier this year when it was Link's birthday in June, I sent them some gifts for his birthday. Some of the items that I sent made it into one of their vlog updates. Yay! Now I will see if my shoe box will make into one of their upcoming vlog updates.


The box opens at the tongue and is closed by lacing a real shoestring through it.


A peek at the inside of the box.

Wednesday, October 6, 2010

Glimmer Trees

For my business I make an assortment of sculptural pieces to make into pins or magnets. I recently made a sculptural tree design that was looking for something beyond the basic coat of acrylic paint. After adding some pizzazz with Art Glitter to some dull looking brads for a previous project, I decided that my new tree design would be a perfect candidate for a similar glimmer treatment. I make my sculptural pieces with resin after I first make an original piece in clay and make a silicone mold from that. With two newly cast, white resin trees ready to be decorated, I decided to make a tree to symbolize summer and one to symbolize autumn. Once my assortment of glitter grows, I’d like to make a tree to represent each of the four seasons.

To make my sparkly trees, I used a variety of glitter and I also tried a microfine glitter this time. I love the sparkle of glitter, but in order to prevent a “sparkle” overload, I varied the sparkle intensity by incorporating some types of glitter with less intense glimmer. This is when using the ultrafine pearlescents are a perfect choice. They are still rich, gorgeous colors, but just with a more subdued bling factor. Using the ultrafine transparent glitters also fit in well to keep the bling intensity under control. I also used a microfine opaque glitter, which gave an additional sparkle effect not seen in any of the other varieties of glitter. The microfine glitter gives a smoother, more uniform glitter effect whereas the ultrafine opaque gives a varied sparkle effect where the glitter sparkles at a variety of angles.

I really liked how my glimmer trees turned out. To try out a varied glitter project for yourself just remember the simple “variety” formula which can be altered with other glitters of your choice. The recipe for my summer tree was: 1 ultrafine transparent + 1 ultrafine pearlescent + 1 microfine opaque + 2 ultrafine opaque = a varied palette of glittery goodness.

For the summer tree I used: 44 Kelly (ultrafine opaque), 519 Reed (microfine opaque), 241 Fresh Lime (ultrafine transparent neon), 182 Astro Turf (ultrafine pearlescent) and 58 Brown (ultrafine opaque)

For the autumn tree I used: 91 Orange Crush (ultrafine transparent), 177 Florida Orange (ultrafine pearlescent), 1 True Red (ultrafine opaque), 62 Copper Canyon (ultrafine opaque) and 58 Brown (ultrafine opaque)

***Note: I also hand-painted an additional pair of trees to symbolize summer and fall, but they just don’t hold the same charm as the glittery ones. After something is glitter-fied, nothing else compares to it.


Monday, October 4, 2010

Look what came in the mail!


This year I participated in a Winter Holiday Gift Swap reader challenge through the Cloth, Paper, Scissors magazine. Awhile ago I sent out the "Wish" pin holiday gift that I made and then I waited until Cloth, Paper, Scissors sent me a gift from another reader who participated in the swap. Today I received my gift and it is so adorable. It's a whimsically embellished wooden decorative piece with a clothespin attached to the back so I can clip it onto something, possibly a picture frame. I absolutely love it.

The piece was mounted on an equally adorable handmade card complete with fun and cheerful ribbon embellishments.
I think my fellow reader and gift-giver must love glitter as much as I do. On the back of the card she printed a very glitter worthy quote, "You're not completely dressed until you have glitter on your face!" Reading that put a smile on my face, especially since I have a love for glitter and I am always thinking of new objects to glitter-fy. Caroline, thank you for the lovely handmade gift!

Want to see some of my glittery projects that I've written for Art Glitter? I have 4 more Art Glitter articles to write. Stay tuned!


Friday, September 24, 2010

Sparkly Altoid Boxes


My love for Altoid tins prompted me to embellish some empty ones that I saved. I tend to be a craft supply “pack rat” and for awhile now I’ve had a small stash of empty Altoid tins just waiting to be decorated. After patiently anticipating their rejuvenation, the Altoid tins finally had their chance to sparkle and shine.

First I spray painted the tins with some leftover antique gold paint. Then I added some glittery touches using the Designer Dries Clear Adhesive & a variety of Art Glitter colors. For the box pictured, I started to make a few random circles with the adhesive and sprinkled one color of glitter over the wet adhesive. Next I let the first set of glittery circles dry. Once they were dry, I made a new set of random circles with the adhesive & glitter. I continued this process until I had random circles across the tin cover in colors of T-Bird (#184), Jamaica (D30) and Siren (D28). I wanted to add just a little more glimmer, so I used Crazy Corn (#D1) to fill in the space between the circles. As one last touch, I used Glossy Accents by Ranger, to apply over the circles.

I liked using the Art Glitter Dazzlers line of glitter for this Altoid tin project. The pieces of glitter in the Dazzlers are larger, and they worked well with the circle shapes on the tin cover. Using the T. Bird (#184) Ultrafine Pearlescent glitter for some of the other circles added some glittery contrast to the larger, more sparkly Dazzlers colors of Siren and Jamaica. I also liked how the Dazzler color, Crazy Corn (D1) had a combination of large pieces of glitter with ultrafine pieces of glitter. And the fact that the ultrafine glitter used in the Crazy Corn is in a red and a gold color, giving it a look of depth and warmth. Using the Crazy Corn color in the background on the tin helped to unify the Dazzlers colors of Siren & Jamaica, with the Ultrafine Pearlescent color of T. Bird. After using the Crazy Corn, it has proven to be one of my favorite colors to use. I never tire of seeing how fascinating the sparkles look in the Crazy Corn glitter. And it’s hard to resist adding it to all the rest of my pieces. You are sure to see Crazy Corn used again in at least one of my future projects. Don’t miss it!

Tuesday, September 21, 2010

Fall is my Favorite

What is your favorite season and why? I enjoy the warm colors of fall and the crisp air. There's a feeling of slowing down and retreating as the summer shifts to autumn. Now that fall is here, I hope to get on the nature trail more often than the summer. I usually go out on the trail often during the summer but this year I didn't go on as many rides because of the hot, humid, rainy weather. It was the one of the rainiest summers on the records for Wisconsin. As it gets closer to the start of fall, I see the hints of my favorite season, along the path and sites around me. It is a bittersweet moment, as I know well, what happens in Wisconsin after fall's departure. I cringe at even the thought of the "s" word and I refuse to write it out in this post. Unfortunately, it will be here sooner than I'd like. I am going to miss being able to ride my bike out around the sites and sounds of nature, always welcoming me to a place to discover new things. My eyes are on the constant lookout for the smallest of details. I'm zipping along past some trees and bushes.....wait......wait.....what did I notice in the corner of my eye. Stop, back up!

There is a new discovery, look at those berries!


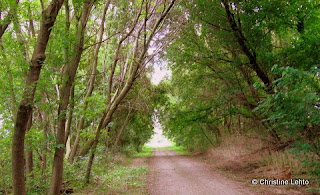
Next I stop within a tree tunnel and see these charming mushrooms
growing up the side of a tree trunk. How wonderful!


Tree tunnels are my favorite parts along the trail. Once fall is gone, I will have to say goodbye to the trail for another year until Spring arrives.

Tuesday, September 14, 2010

A time to smile!

While I wait for my replacement laptop from HP, I try to keep myself busy doing other things. One of those "other" things, using my sister's laptop to get online and view the most recent Rhett and Link music video. These guys are so creative and enjoyable to watch. Take a look at their new music video about 600 pillows.....very nicely done backwards!


Friday, September 10, 2010

Glittery Petite Purses

This is my first “official” Art Glitter project and I had loads of fun embellishing my Petite Purses with gorgeous, sparkly Art Glitter. Fall is just around the corner and it happens to be one of my favorite seasons, so I decided to make some purse designs with an Autumn theme. I make my Petite Purses out of sheets of fun foam and an assortment of embellishments. I have used the purses for presenting little treasures tucked inside such as the sculptural pins and magnets that I make. My Petite Purses come in two sizes, small and large. The purses made for this project are made in the larger size, which are a perfect size for gift cards.

While at a local craft store, I found some leaf embellishments and decorative brads to add some pizzazz to my purses. However, the most pizzazz came once the Art Glitter was applied. It was the last feature I added, but it was definitely not the least. Wow! The glitter completely transformed the purses and they gleamed and glistened with more life than before!

And speaking of transformation, I was able to turn my dull plain brads for attaching the purse straps, into some sparkly wonderful brads. I did not have the correct color of brads to use on my fall colored purses, so I looked to the transformative properties of the glitter as my solution. The brads were in light pastel colors, not quite the colors associated with Autumn. This is when the Art Glitter and the Designer Dries Clear Adhesive came to the rescue. After the plain brads were fastened to both the purse strap and the purse flap, I applied some Designer Dries Clear Adhesive to the brad caps and covered them with one of the following colors of glitter: Ultrafine #65 Old Gold, Ultrafine #56 Pumpkin, Ultrafine Pearlescent #179 Tang. I was very pleased with how the adhesive and the glitter completely transformed the brad caps from dull to dazzling. Hurray! Way to go, Art Glitter and Designer Dries Clear Adhesive! You two make a fantastic combination.

Once the leaves and brads were attached to the purse flaps, I used the Ultrafine Metal Tip on my Designer Dries Clear Adhesive bottle to start making swirls and other designs. Sometimes I used just one color of glitter to sprinkle over the adhesive, but other times I mixed some of the glitter colors together to expand my glitter color options. Another technique I used was sprinkling one of color of glitter sporadically over the adhesive and then sprinkle over it with another contrasting color to cover any remaining areas of uncovered adhesive. For example, I used the Ultrafine Pearlescent (179) Tang to sprinkle on here and there over a drawn out design in adhesive and then I’d use the Ultrafine Opaque (56) Pumpkin color afterward to cover any “un-glittered” areas of adhesive. Adding glitter in this way resembled the gradation of leaves changing color in the Fall.

I discovered the joy and contentment of working with glitter. The sparkle of glitter is so enchanting and inviting. The Art Glitter bug has bitten me. Stay tuned for more glittering projects.

Glitter colors used: Ultrafine #65 Old Gold, Ultrafine #56 Pumpkin, Ultrafine Pearlescent #179 Tang, Dazzlers #D30 Jamaica Hexis Grande, Dazzlers #D1 Crazy Corn Funky / Supplies: Designer Dries Clear Adhesive, sheets of fun foam, eyelets, decorative and plain brads, hot glue / Tools: Ultrafine Metal Tip, scissors, hot glue gun, stylus, wavy edge scissors, paper punch

Wednesday, September 1, 2010

Hellooooo......anyone out there?

Hello! I've neglected my blog for way too long. How are you out there in blog-land doing?

Things over here are okay. I am getting ready to receive a replacement laptop from HP. If you have read my previous blog post, you can see how much wasted time and headaches that I've spent dealing with HP. Hopefully my replacement computer will not give me so much grief and cause me any additional inconveniences.

Last week I sent in my first blog article for the Art Glitter website. It's the first of six articles that I will be writing for them. I am excited about doing the articles since I love to write and to work with glitter. Working with glitter is so very relaxing and I never tire of the way it sparkles. The only thing that I wish I could resolve is the way glitter seems to migrate to other areas where you'd prefer it would not go. Anyone have some tips on how to control glitter migration?

Tuesday, June 22, 2010

Will NEVER buy another HP laptop

I purchased my HP laptop online at http://www.HP.com/ on December 9, 2009 and received it on December 21st. Starting on Dec 29th I began to have problems with my laptop and had contacted HP customer support. From the 29th of December until today, I have continued to have problems with my laptop. The week of February 8th I sent my laptop in to get fixed with HP. In the paperwork that I sent along to HP, I noted that I am unable to get a consistent wireless connection along with some other issues. Without being able to reliably access the internet, I have not been able to effectively run my online business or a variety of tasks. Ever since I’ve gotten this computer I’ve wasted my time trying get my problems resolved, and each time HP has recommended what to do and I’ve spent the time doing what they said, nothing has improved. In fact most things have gotten worse. I resent how I’ve been getting the runaround from the HP staff.

On Friday, March 12th I talked to Kevin, a case manager, about my frustration with my laptop. I told him that I wanted to exchange my laptop for a new one or return it. Kevin would do nothing to resolve this issue besides offer to send it in again to get fixed. I think that is absolutely ridiculous. I already sent it in three weeks prior and more problems have been happening since I sent it in. I told Kevin that I did not want to deal with my current laptop anymore and that I was ready to throw in the garbage. All he would tell me is that he understood my frustration. No, I don’t think he did, because if he really did he would have done whatever was humanly possible to lessen my frustration.

During my conversation with Kevin, I was telling him about some of the problems with my laptop. He told me that it sounded like my hard drive might be corrupted and that my wireless card might be damaged. What kind of product encounters issues such as this after only 2 months and AFTER getting repaired by the company that manufactures them? I believe I was sold a “lemon” and want my money back.

It is totally unacceptable for a brand new computer to be racked with so many problems. When I sent in my computer the first time, I was inconvenienced while it was gone. Not only that but I needed to remove everything off of my computer before sending it in, just in case the info on my computer would be wiped out while getting fixed. In addition, I had to reload all of my software for a second time once I got my computer back from being “fixed.” And let me note, that I had to send my computer in only after two months of ownership, which should not be the norm. A brand new computer should not have these kinds of issues if they are a reputable company.

I find it appalling that HP will not stand behind their product because right now I view their product and company as inferior and unreliable. After my experience with their product and with their staff, I will never spend a cent on their product. Nor will I be silent about my dissatisfaction with HP. I will post in my Facebook account, my Twitter account, my blog and any other chance I get.

And now my CD/DVD drive is not working. Within 6 months I've had way too many problems. Plus, I have gotten the brush off from HP staff and two times they lied to me about trying to contact me. No more HP for me!!! I am more than ready for a Mac and I am ready to smash my HP laptop into pieces.

Tuesday, April 13, 2010

Up-cycled Bottle Sculptures


re-Bottled couple

I have a tendency to hold onto items that I think I can make into something else. For instance, when I ran out of shampoo and conditioner, I thought I'd hang onto the empty bottles to use for a future sculpture project. I started out making cat sculptures from them.

re-Bottled sculpture

Since then, every time I come across a bottle ready to be tossed out, I think about what I could create with it. My latest creations called "Re-bottled" sculptures, are simple people sculptures. The first three that I made are shown here.

UpCycled Sculpture

Here's my little lady sculpture next to the same type of plastic bottle that I used to create her with.

UpCycled man and woman

Here's the Up-cycled couple next to similar bottles used to make them.

UpCycled sculptures

And last but not least, here's my Charles sculpture alongside my Up-cycled couple. Charles was made with an empty soy sauce glass bottle and I used 2 mini burned out halogen light bulbs to form his head. I love thinking of new things to make with items thought to be useless garbage. Hope you enjoyed seeing my Up-cycled work!

Tuesday, April 6, 2010

Red Pepper and Eggplant Pizza Recipe

Here's the recipe to one of my favorite recipes to make. This is a delicious pizza that once you make it, you will want to make it again and again. Happy eating! :)

  • 1 eggplant, diced
  • 1 red pepper, diced
  • 1 red onion, thinly sliced
  • 2 tablespoons of your favourite pasta sauce
  • 5 or so cherry tomatoes, quartered
  • pre-made pizza base (omg!)
  • 1 clove garlic, finely chopped
  • 1 ball fresh mozzarella, diced
  • fresh basil leaves
  • pinch dried oregano
  • balsamic vinegar
  • salt, pepper, olive oil

1) Heat a little olive oil in a pan and fry together the garlic and onion to soften.

2) When browned add the eggplant and red pepper, toss together in the oil and garlic, add a touch of balsamic, season and cover for 10 - 15 mins on a low heat so that all the vegetables are nice and soft.


3) Spread the pasta sauce thinly on your pizza base and give it a little sprinkling with some extra oregano. Spread your vegetables evenly across the base. Dot with the mozzarella cubes and quartered tomatoes. Make sure the cheese is evenly distributed to ensure a nice even layer when it all melts.


4) Drizzle with olive oil and give it a good grinding of black pepper. Hot oven (220C), 15 mins or until the cheese has melted and gone a lovely golden colour in places.

5) Decorate with fresh basil leaves. Cut and serve!


I found this recipe at,

http://www.opensourcefood.com/people/yongfook/recipes/red-pepper-and-eggplant-pizza

Saturday, March 27, 2010

An UpCycled Answer & The Winner Is.....

Hello to my blogging fans. Thanks to all of you who participated in my blog giveaway. I plan on doing some more giveaways this year, so stay tuned. I asked you to answer the question about what UpCycled item I used for my Susan sculpture. As most of you guessed, it is in fact a light bulb.

I also have used the smaller, itty, bitty burned out halogens to make mini sculptures. I named these 2 mini ones after my nieces, Kristin & Katrina. The one in pink is Kristin, who happens to have a similar hairstyle as the sculpture. The one in yellow is Katrina.


I got these mini halogens from a store I worked at. Anytime there was a bulb that burned out, I asked if I could have it.


Anyway, the random number generator picked number two, which belonged to Melissa. Congrats to Melissa! You will be getting a Mr. Fluffy Bum Bottom pin and Petite Purse mailed to you just in time for Easter.

Saturday, March 20, 2010

My Cat, A Bee & Me!

The weather has finally been warming up here in Wisconsin, so the other day I gathered some of my pieces to clean outside with my new Dremel stylus. It was wonderful to be outdoors in the fresh air and sunshine. However, after taking a break from my cleaning, I came back to find a bee or a hornet visiting my pieces. Yikes! I never got stung by a bee, so I did not want to start. My kitty cat wanted to chase after it, which made me all the more nervous and I carefully grabbed my kitty and put him inside. When I took this picture, I did not even notice my cat made it into the corner of the shot.
Can you see my buzzing visitor sitting by the two Dremel wrenches? He put a little delay in my cleaning plans.

Thursday, March 18, 2010

Win a Bunny Pin & Petite Purse

Hello! In honor of Easter and to celebrate the growth of my Facebook fan page I'm going to have a free giveaway at my blog starting today. I have a fun little quiz for anyone interested in entering to win one of my "Mr. Fluffy Bum Bottom" bunny pins and one of my Petite Purses. A picture of Mr. Fluffy Bum Bottom is shown below.

The exact Petite Purse will be a surprise. Here's a sampling of some of my Petite Purses, which come in a small & a large size. The small size is perfect for giving a small gift in like a pin, magnet or necklace, the larger size is the perfect size to hold a gift card or a small trinket/treasure. This giveaway will be for the smaller size Petite Purse.Now it's quiz time! Shown below is a photo of one my sculptures named Susan (after one of my sisters). She likes the dress and said she would wear a dress like that one, so when I was thinking of a name for her, I decided to name her Susan. Anyway, my question to you is.....what did I use for the structure of this sculpture? Clue: It's an object that I UpCycled. Another way to get a clue is to visit my store and look in my UpCycled sculpture section and find out what I used for some of those pieces.

Contest closed. Time to pick a winner!
All correct answers will be entered into a drawing for the bunny pin & purse. Please include your e-mail address in your comment/answer, otherwise you won't be entered into the contest even if you answered correctly. Contest closes at 11pm CST on Thurday, March 25th. Good luck!